Lightroom’s “Soften Skin” brush.

I stopped using this Lightroom’s “Soften Skin” brush preset for retouching quite some time ago. I’ve seen many otherwise photos in my social network newsfeeds ruined by the use of this filter, so I felt compelled to write something about it.

Why I don’t like it.

There are two major side effects of this filter that really bug me. Contour Flattening, and Colour Artifacts/Distortion.

Colour.

Lets start with Colour.

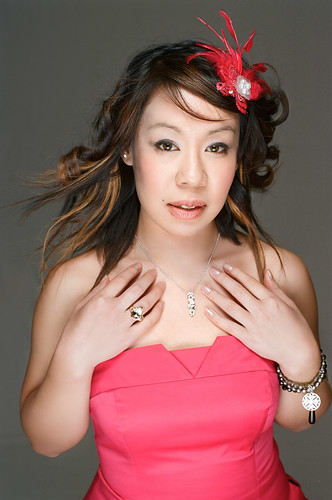
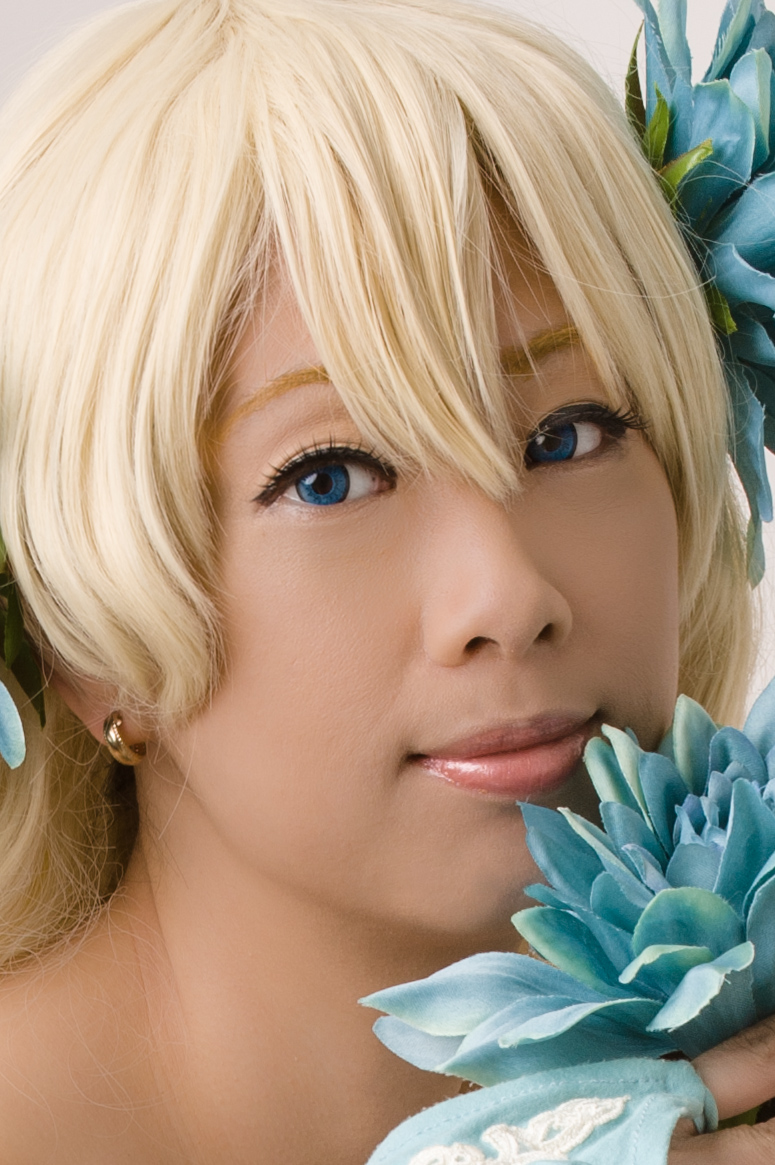
For example, take this worst case scenario: my ugly mugshot, no makeup patchy skin. You can click through for the 100% images (yikes)

Out of Camera, with Gray Card
Soften Skin Brush Applied

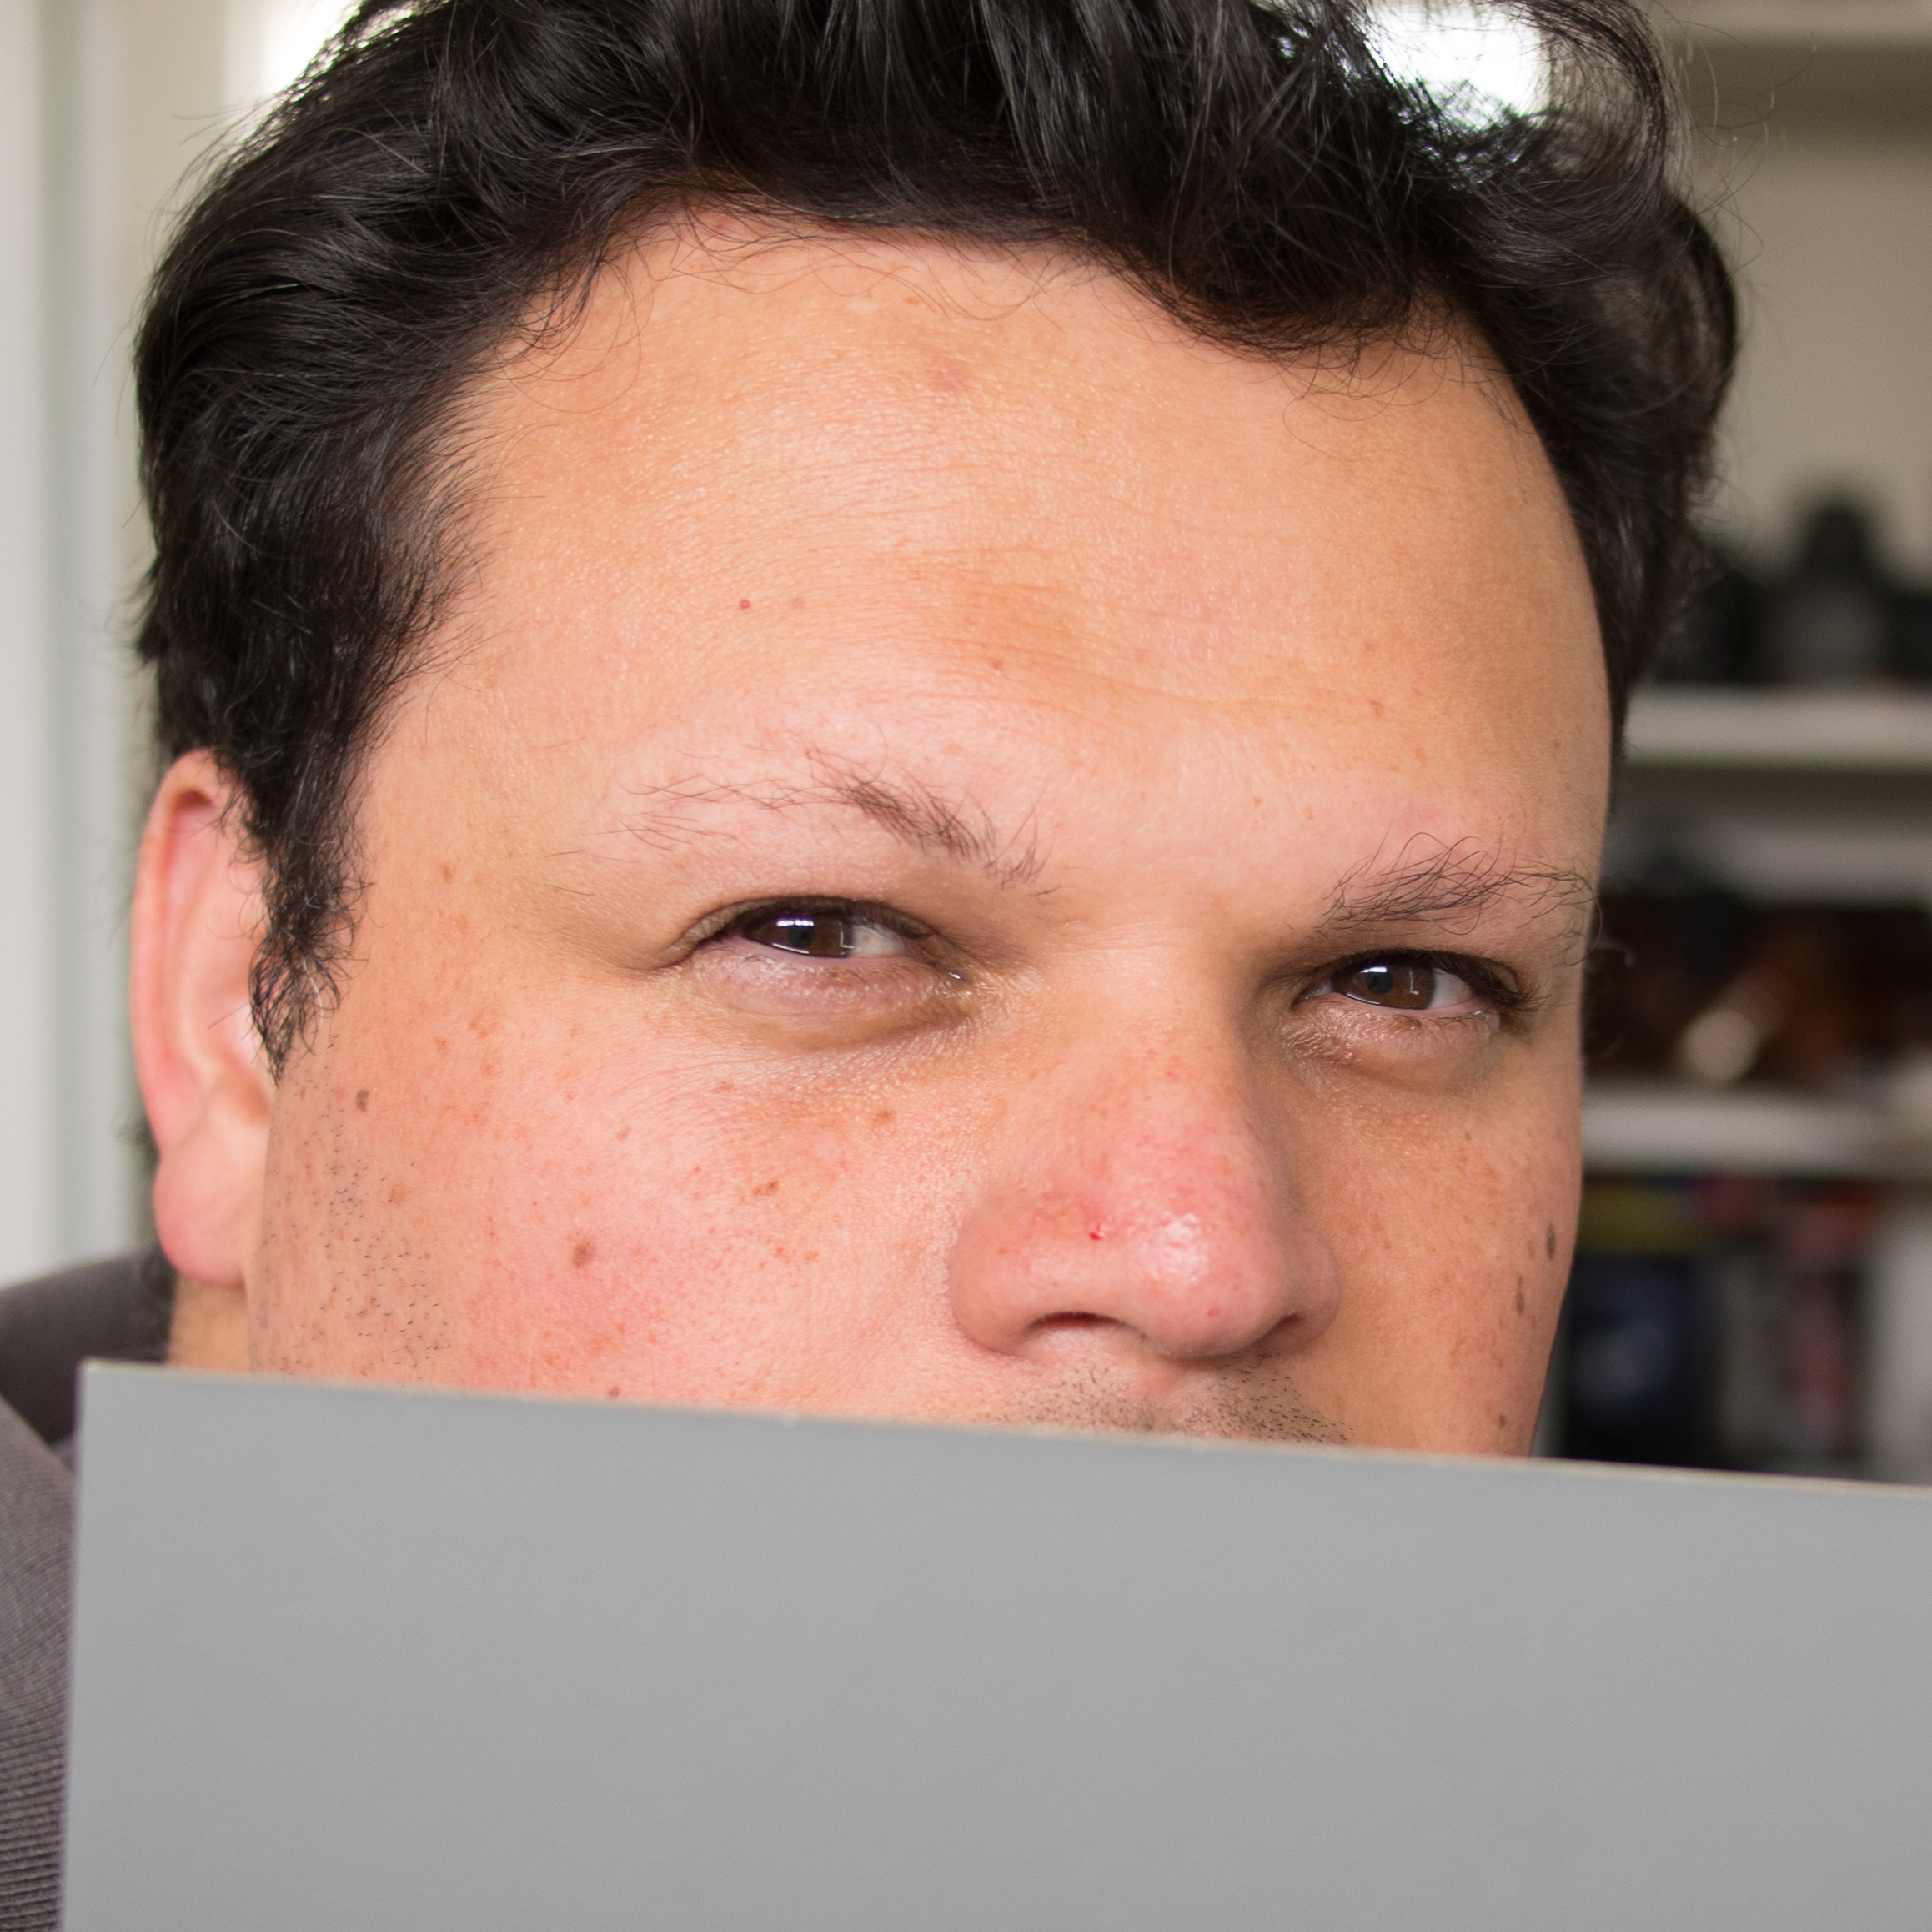
Pores and spots are greatly reduced, but what is going on with the colour? The red areas are now these weird patches, the freckles have turned orange, and theres weird yellow/brown patches above my eyes. My forehead has also turned orange.

Basically while this tool softens the contrast in pores, blemishes and wrinkles, it also smears the colour around, and actually draws more attention to it. Maybe I’m just very picky when it comes to colour.

I find this is noticeable even at mild levels of usage. Take an example from one of the typical “how to retouch with lightroom” tutorials on the web. Notice the yellow blobs under the eyes?

Flattening

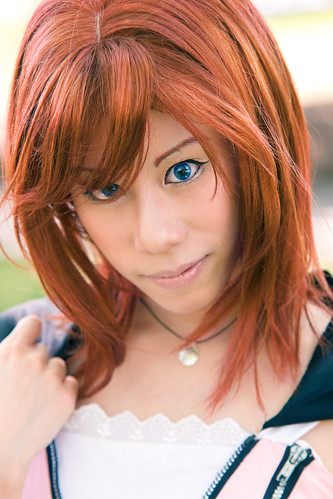
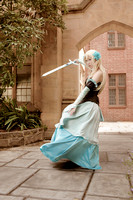
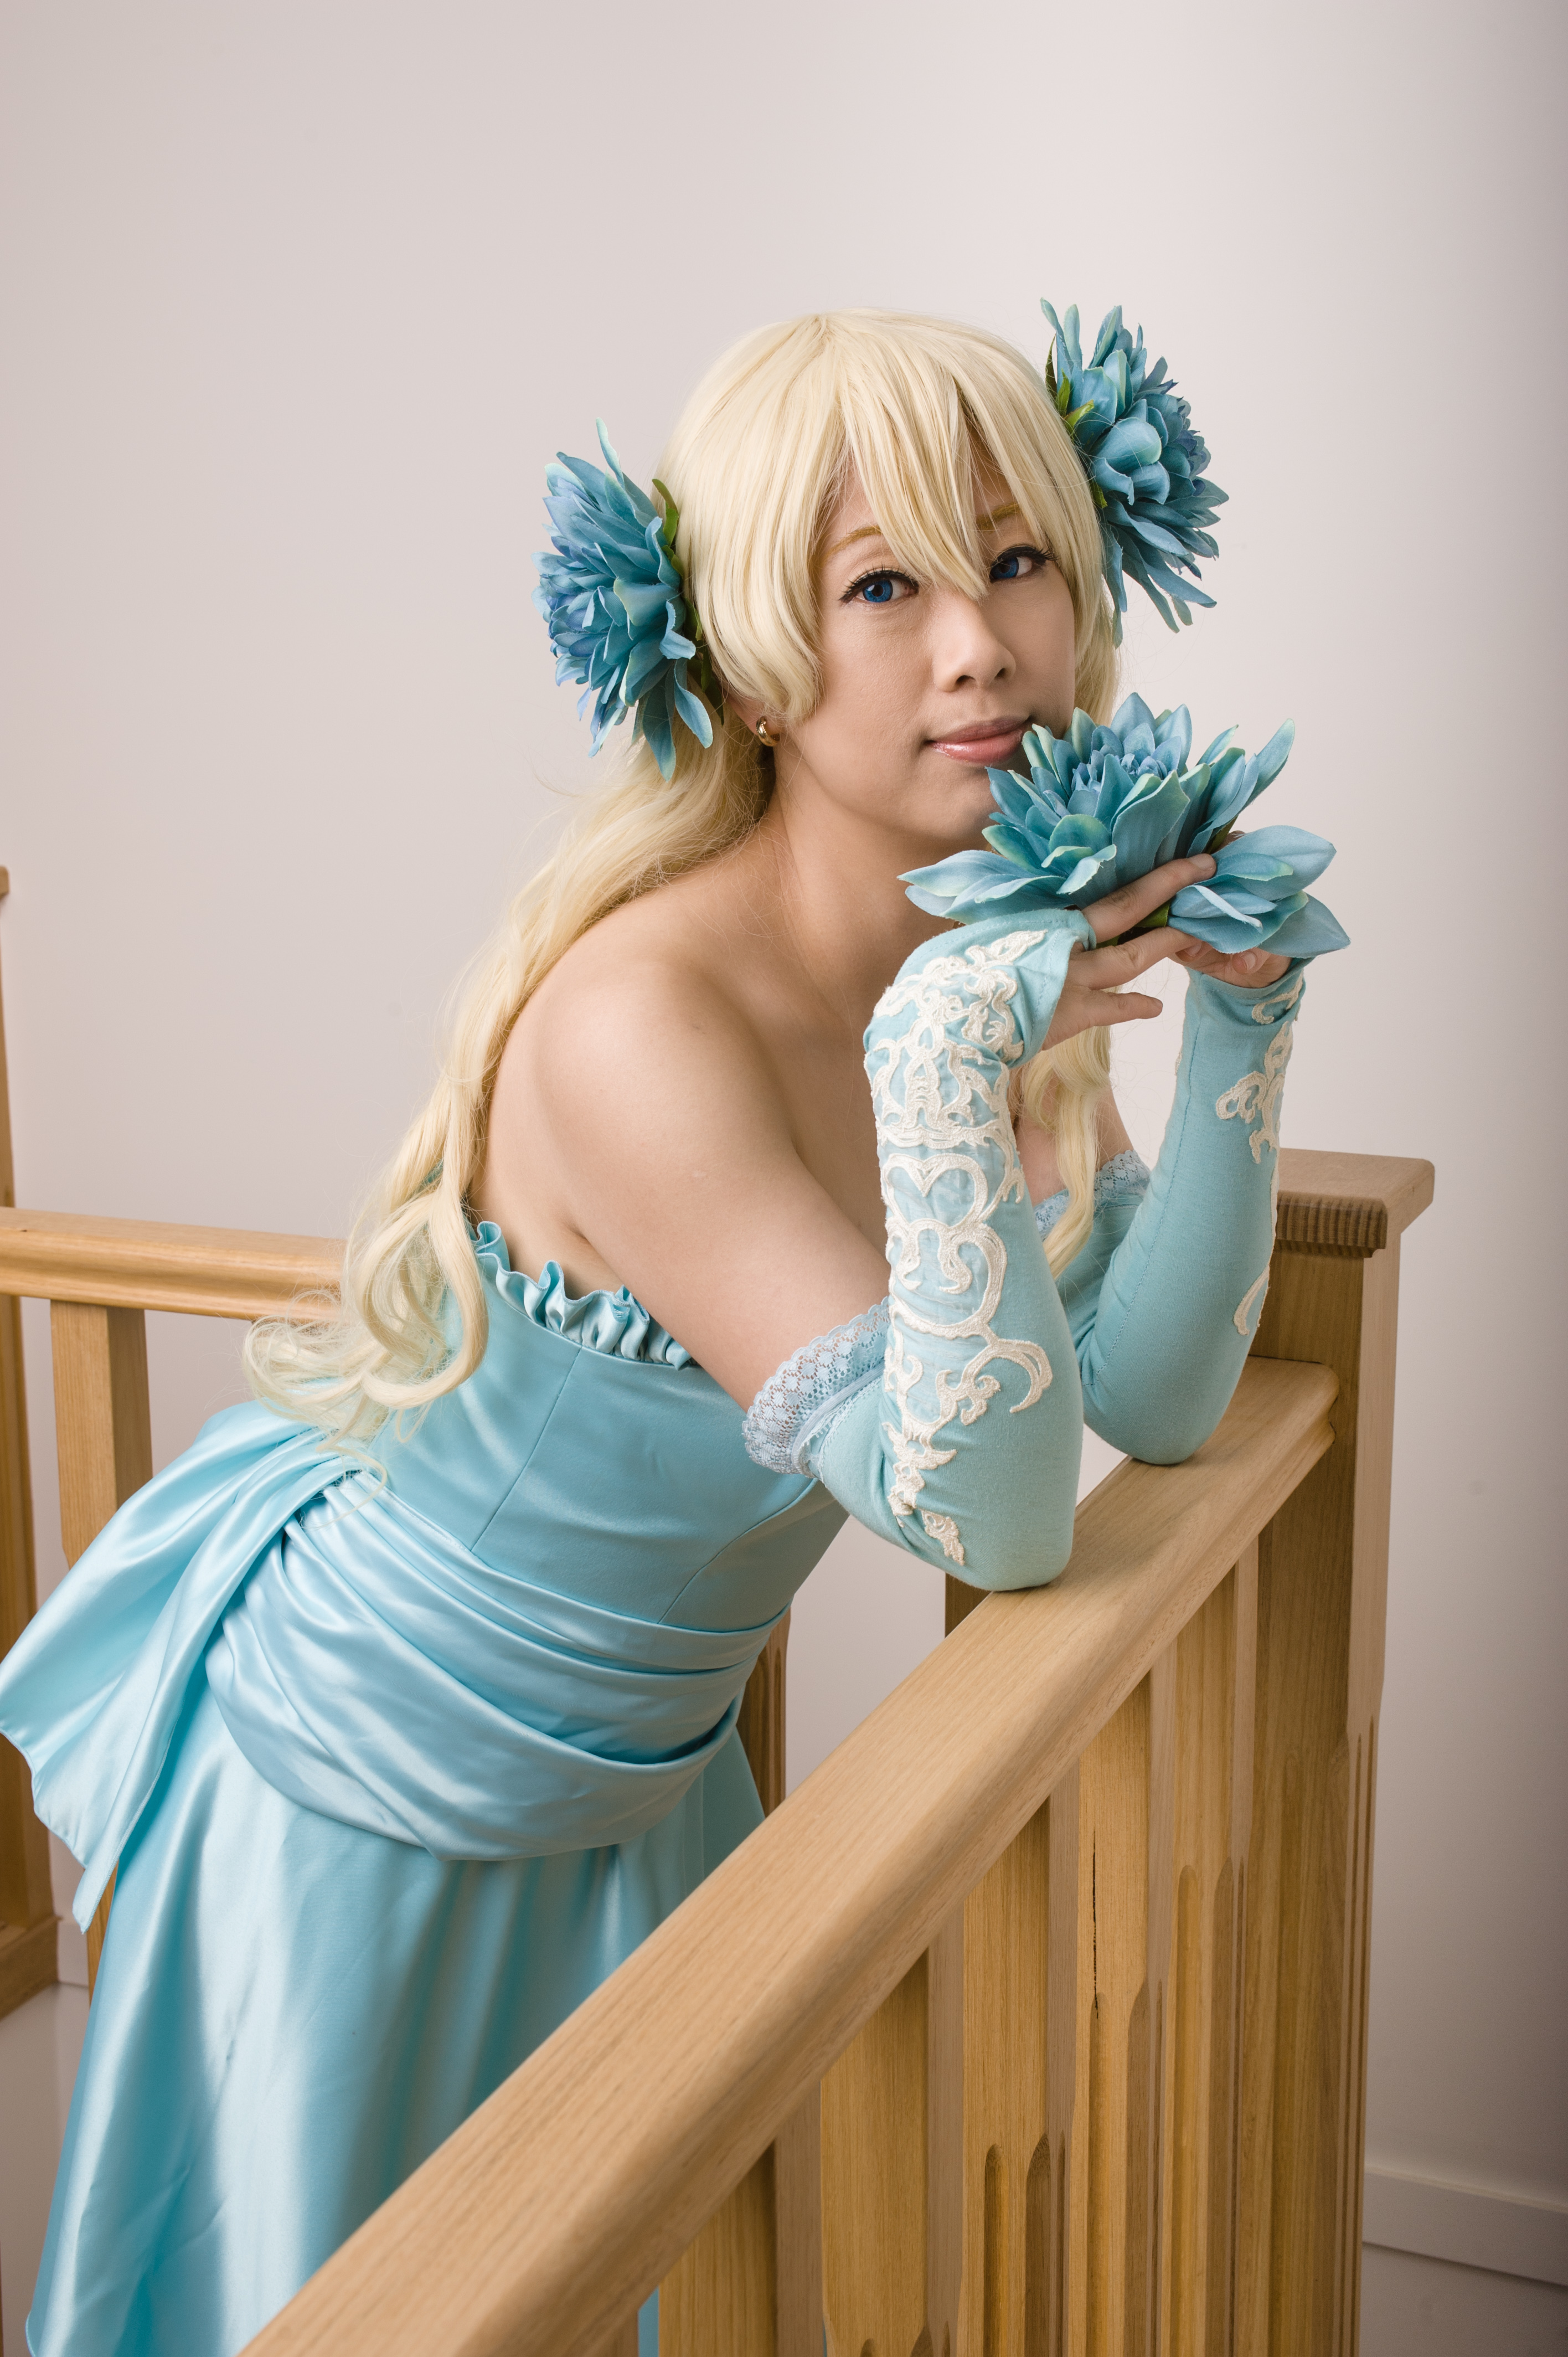
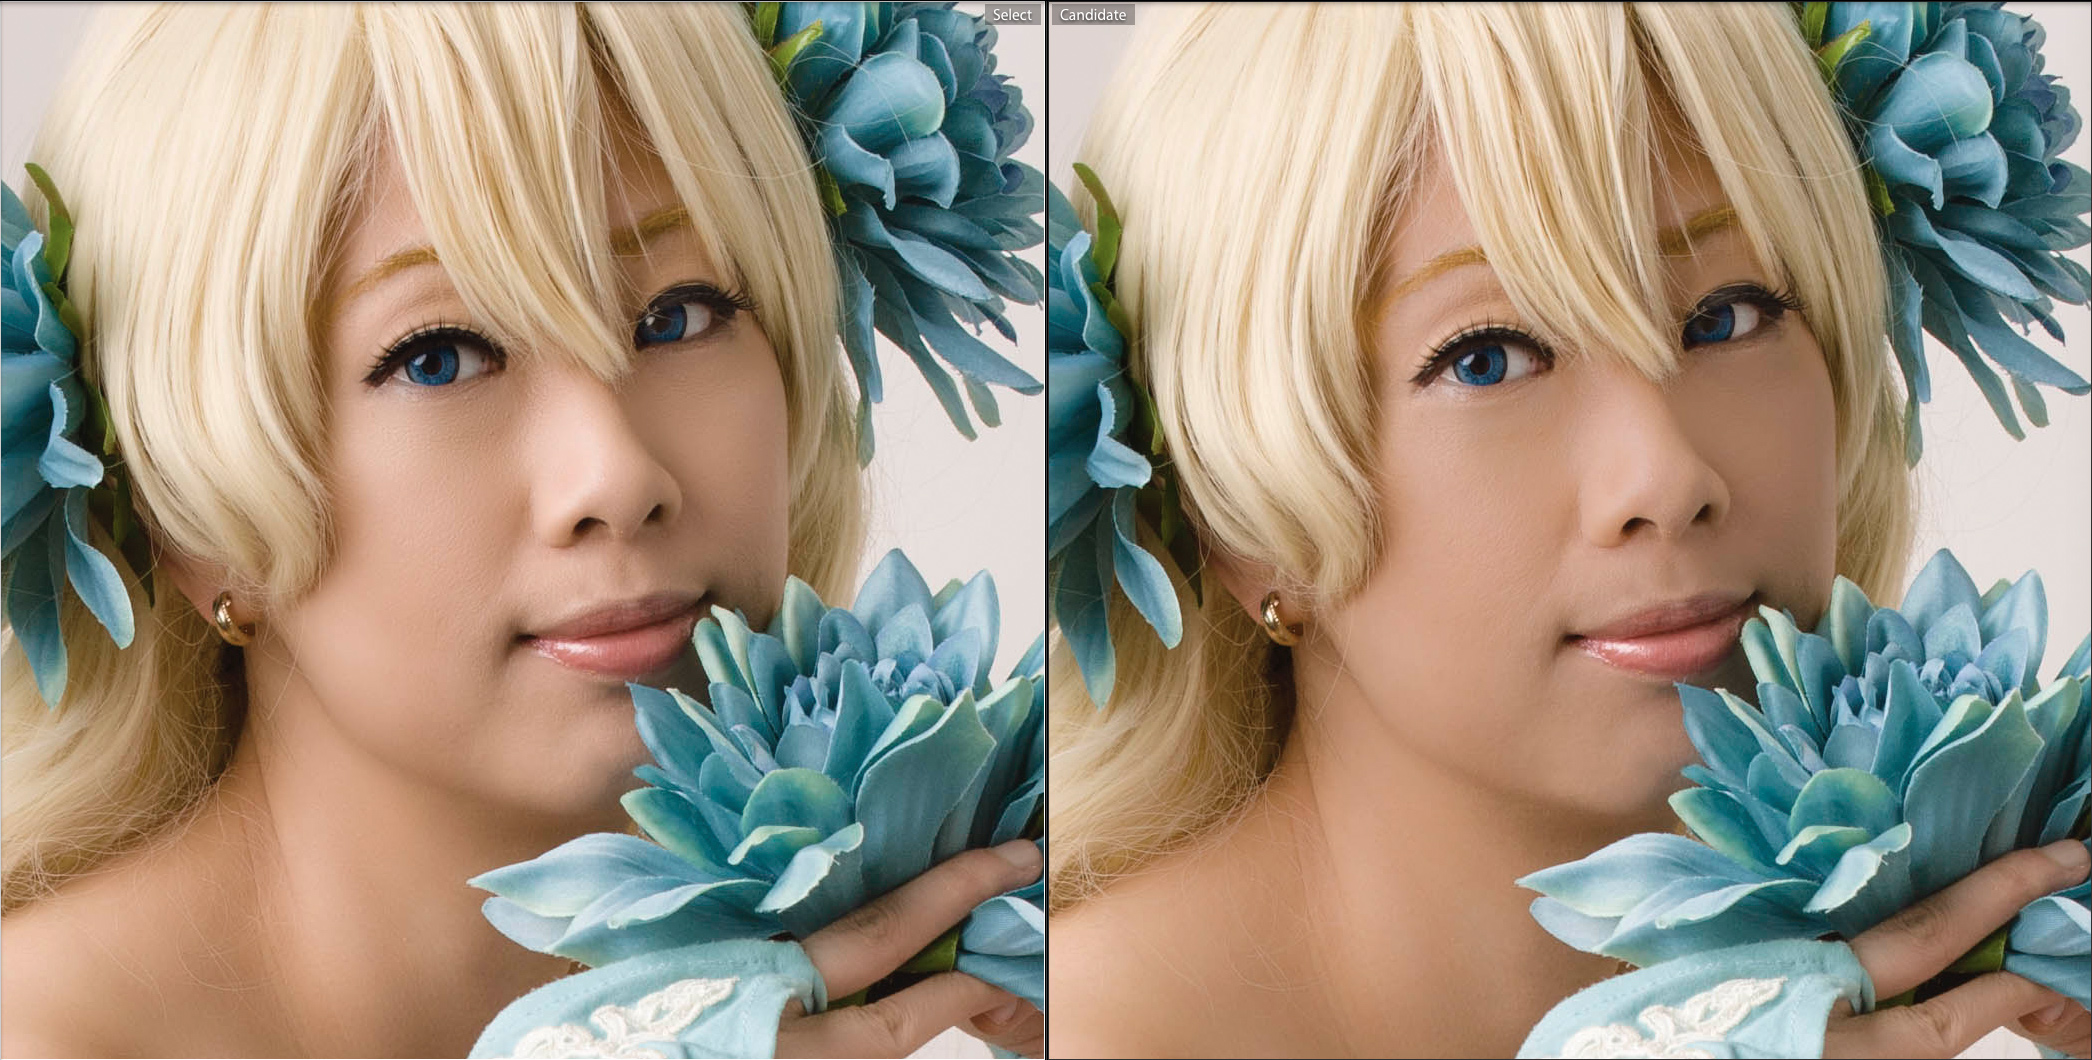
Since the Soften Skin filter works on removing local contrast (a.k.a Negative Clarity), it darkens highlights, and lightens shadows. Here is a recent image from my cosplay photography work. I’ve done exposure and white balance adjustments, and applied the Fuji Pro 400H preset from Totally Rad’s Replichrome package.

Base Image

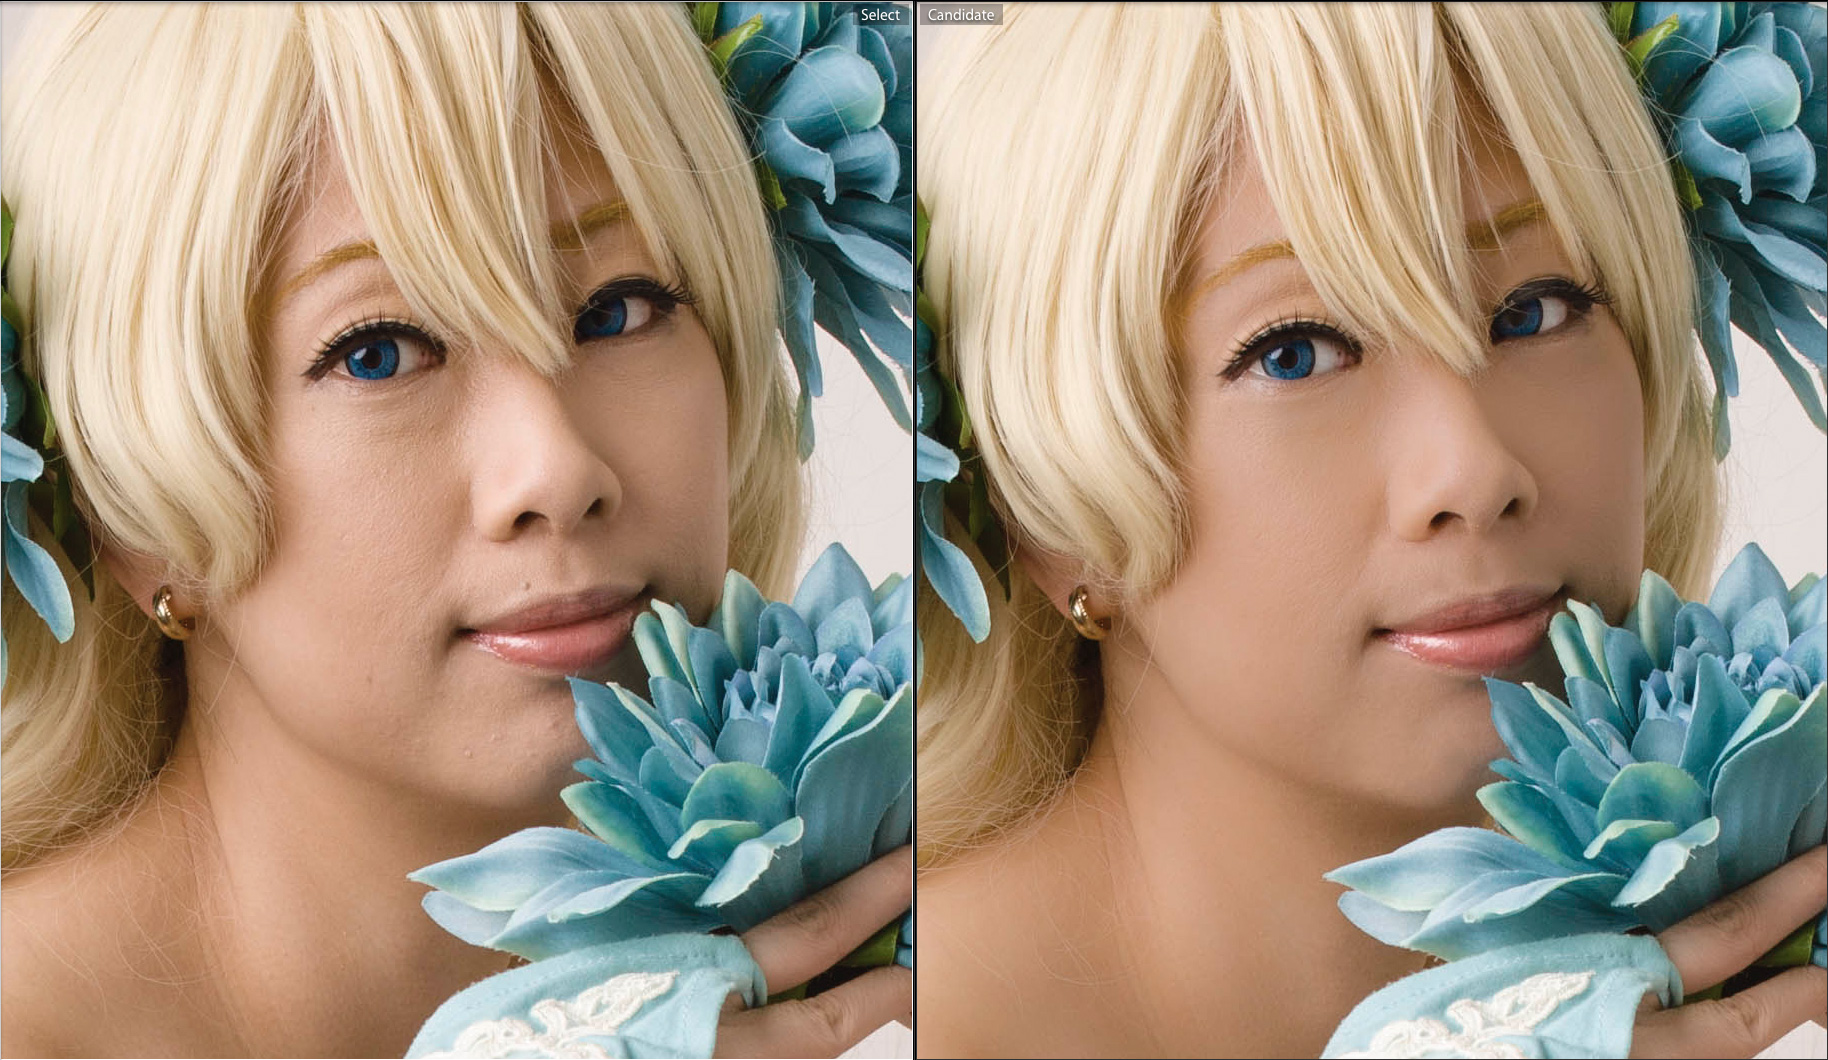
Now lets remove some blemishes with the healing tool and apply the “Soften Skin” brush:

Lightroom “Soften Skin” brush

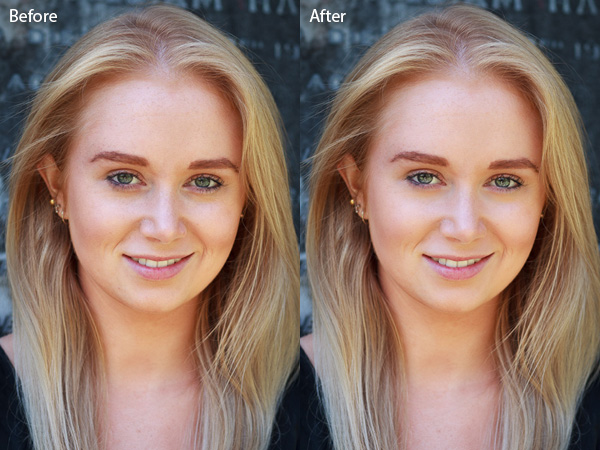
Everything is nice and smooth an soft with no visible colour artefacts (good light, and good makeup). But the contours and shape of the face have been completely lost. Its also somewhat darkened everything. Lets compare the original side by side:

Before and After Comparison

I normally use frequency separation and dodge and burn as my primary retouching techniques. So lets compare a near complete photoshop retouch vs the Lightroom version.

Photoshop vs Lightroom

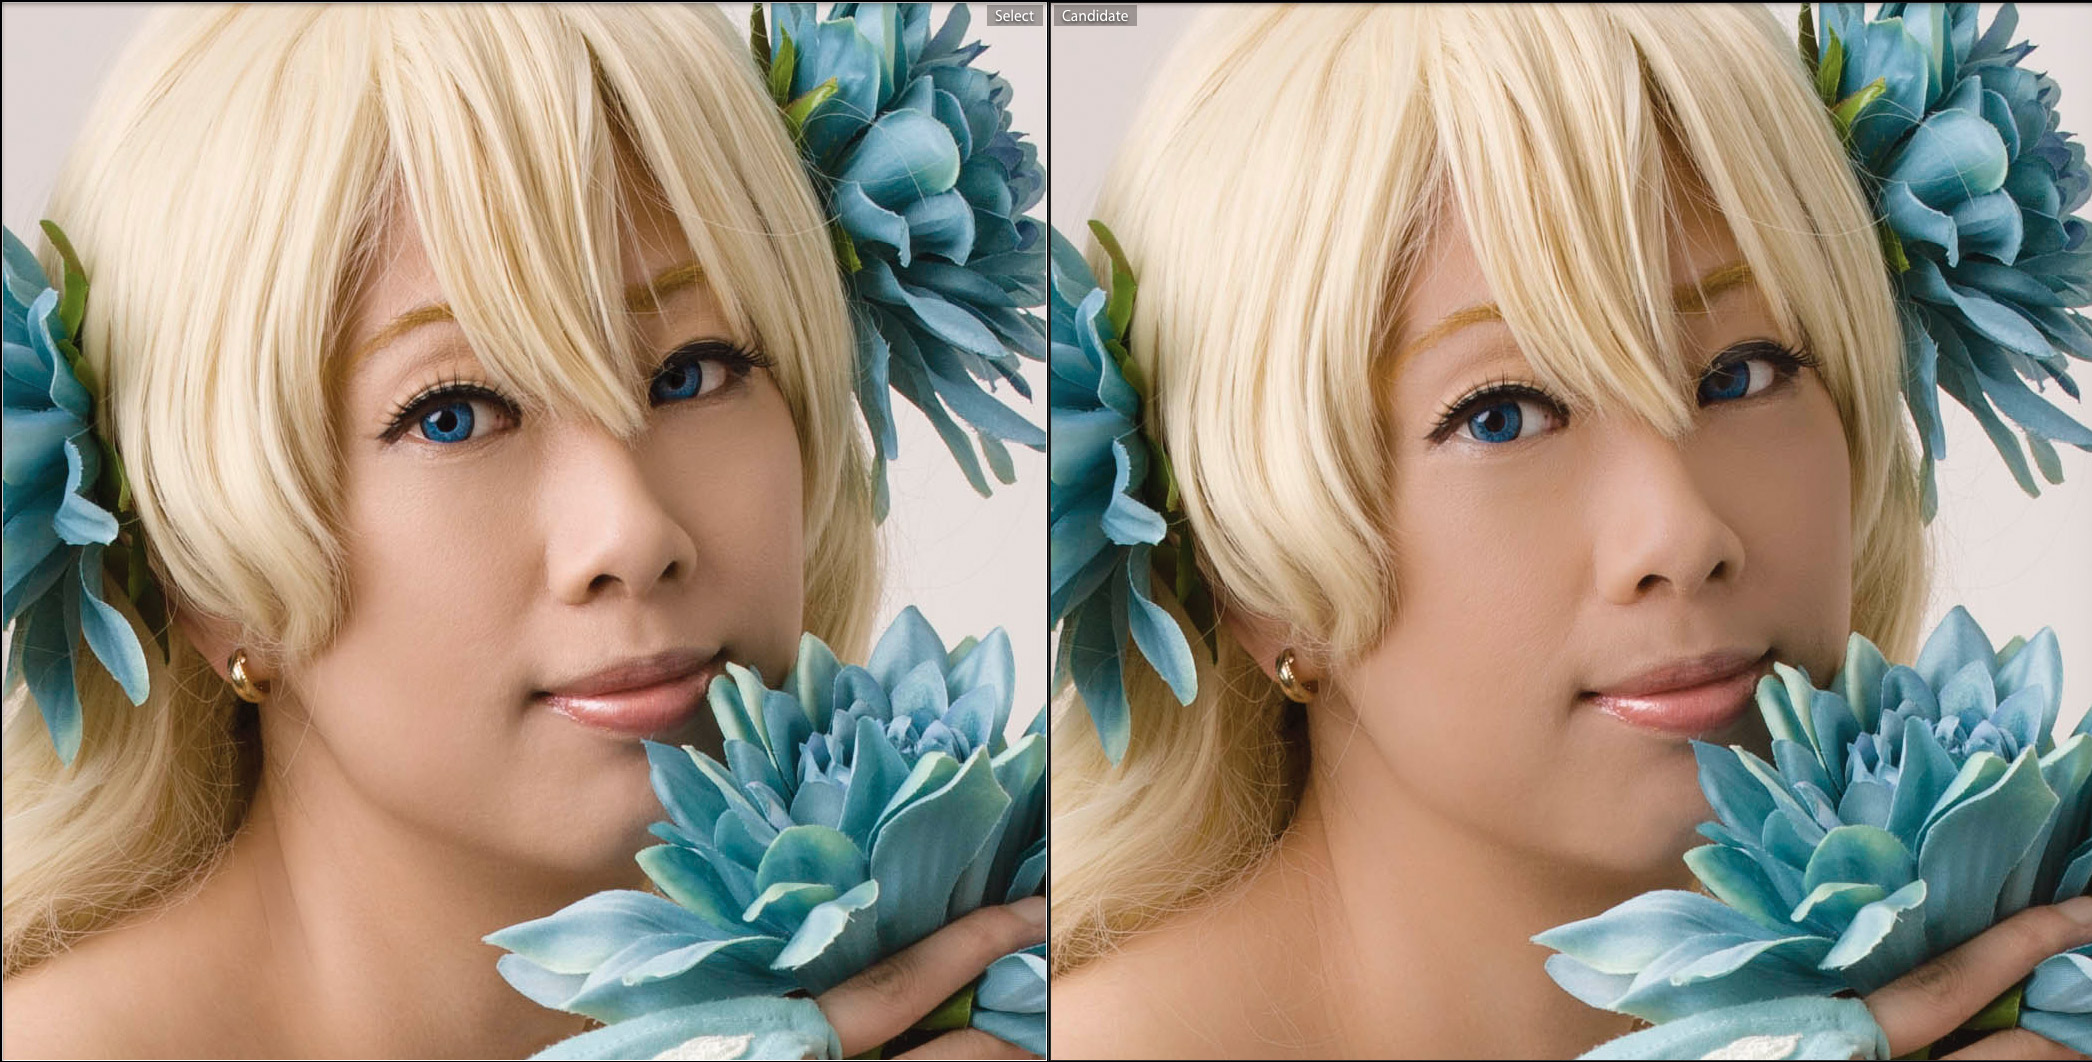
Some more dodge and burn is needed, and the lack of a catchlight in the left eye is bothering me. However you can see that frequency separation produces far better results.

Color Efex Pro

“But Elo, I don’t do Photoshop, and that looks like it takes a long time to do!”. Well, with practice you can get very quick at using frequency separation in photoshop. With an action, you don’t have to mess with layers, I use FXRays’s excellent set of actions, check out the tutorial while you’re there. With a pressure sensitive tablet, and keyboard shortcuts you can get even faster.

So what’s the alternative? Color Efex Pro’s Dynamic Skin Softener. If your image is lit properly, and your model has good makeup this works amazingly well. Color Efex Pro is now free, so give it a try.

Color Efex Pro 4 vs Lightroom

Conclusion

The “Soften Skin” brush in Lightroom, does work but needs to be handled very carefully to avoid flattening depth. As it does not adjust the skin colour, it ends up making things worse and this also needs extra work. At this point, you may as well be in photoshop so you can use the more powerful tools.


Old Photos Re-Visited

Its been almost 4 years since I started doing photography. I’ve recently been looking back at some of my early photos and decided to start picking some at random and re-touching them in photoshop. Back then I also didn’t do any re-touching at all since photoshopping was “bad”. All I my post-shoot work was done in Lightroom.

Nowdays, I barely use Lightroom at all other than catalogue and the most basic things like exposure and white balance. Everything else is done in Photoshop. However I still don’t like using liquify and for the most part I’ve managed to avoid it 😀

Here is are the photos I’ve done so far.

Stacy

Shot on Kodak Portra 160NC I think?  I had it developed and  “pro” scanned at Michaels. I had gone to them previously but after this I decided never to go with them ever again. The jpg files where over-sharpened and had a nasty green colour cast.  I fixed that with colour balance adjustment layers, softened skin, dodged and burned. Though I really need to re-scan the negatives myself and start again.

Hitomi

One of the first cosplay meets I attended. I was just shooting available light with no reflector. I went backwards and forwards with dodging and burning for ages before settling on this version which still looks fairly natural at least. I now always try and shoot with at least a reflector or fill flash of some sort.

Celina from Fables in Fashion

One of the first photos of I took of Celina. The reflection from the grass left an icky green colour cast in the shadows. The white balance slider wasn’t going to cut it, so again masked colour balance adjustment layers in photoshop. Dodged the highlights in the hair, corrected eye colour where the natural iris was showing underneath the contact lens.

Sefie

From the first ever studio shoot. The original selections weren’t quite right I think. selected ones that looked good rather than things that were important to the character (In this case, the rings). I cleaned up the fly aways from the wig, smoothed the background and my standard dodge/burn skin.

Hayden

Even though this was studio, somehow the Sony A700/Adobe Camera Raw still managed to mess up the skin colour. This was the number 1 reason why I made the switch to Nikon. Cleaned up the skin a little bit then spent AGES with masked colour balance, hue, vibrance adjustment.

The Epic…

I’ve been working quite a lot with aomarine and a little bit with aya-tan on their Zektbach cosplay project, AO spent lot of time planning trying to secure a suitable times and locations and it all came together in August. We also did a Kuroshitsuji shoot during the same time period. During the rest of the year we did various other Zektbach related shoots given weather and time constraints.

Also a big thankyou to all our assitants Rei, Linc, Faith who helped us out on various shoots, also Regan who happened to be at Melbourne Uni and helped us out too! Also to Hayden and Elaine who were second photographers and assistants for the Kuroshitsuji shoot.

Its an absolute pleasure working with AO 😀 We’ve still got a few more Zektbach shoots planned, so weather, location, and time willing there will be many more shoots!

Below is are photos from each of the shoots, you can click through to see the complete set.